
The heart of your customer relationships
The Customer Hub is where every customer lives in CoreFlow, their details, their history, their appointments, and their invoices, all in one record. Whether you're checking someone in or reviewing a long-standing account, this is where you start.
This guide follows our sample business, Riverside Wellness Group. You'll see familiar customers like Blue Ridge Hotel and Sunrise Fitness throughout.
A tour of the Customer Hub
When you open Customer Hub, you see every customer in one organized list. Here's how it's laid out.
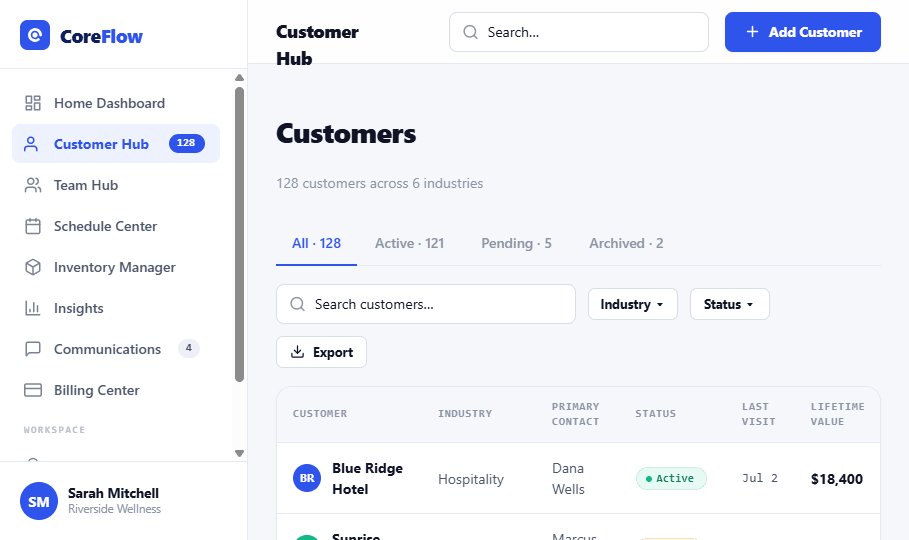 1
2
3
4
1
2
3
4
Finding a customer
With a growing list, search is the fastest way to the customer you need.
- Click the Search customers… box above the list.
- Type any part of the customer's name.
- The list filters as you type, the customer you want rises to the top.
Opening a customer
Every row is a doorway to the full customer record.
- Find the customer in the list.
- Click Open at the end of their row.
- Their full profile opens, contact details, history, appointments, and invoices.
Adding a customer
When a new customer arrives, add them in a few seconds.
- Click Add Customer in the top right.
- Enter their name, industry, and primary contact.
- Save. The new customer appears in your list right away, marked Active.
Filtering & tabs
The tabs across the top keep your list focused on exactly the customers you care about right now.
- Click Active to see only current customers.
- Click Pending for customers still being set up.
- Click Archived to find customers you've set aside.
The number beside each tab tells you how many customers are in it, so you always know the size of your list at a glance.
Tips & best practices
- Keep records current. Update contact details as they change so the whole team stays in sync.
- Archive, don't delete. Archiving keeps the history while clearing your active list.
- Use search first. It's almost always faster than scrolling.
- Check lifetime value. It helps you recognize and look after your best customers.